Learn to Code with Tas and Excel Lesson 2 - Tas3D Zone Writer
In the last lesson of this series, we learned how to setup our machine to write macros, and we wrote our first simple Excel macro. Our first macro:
- Opened an instance of the 3D modeller
- Created a new 3D modeller document
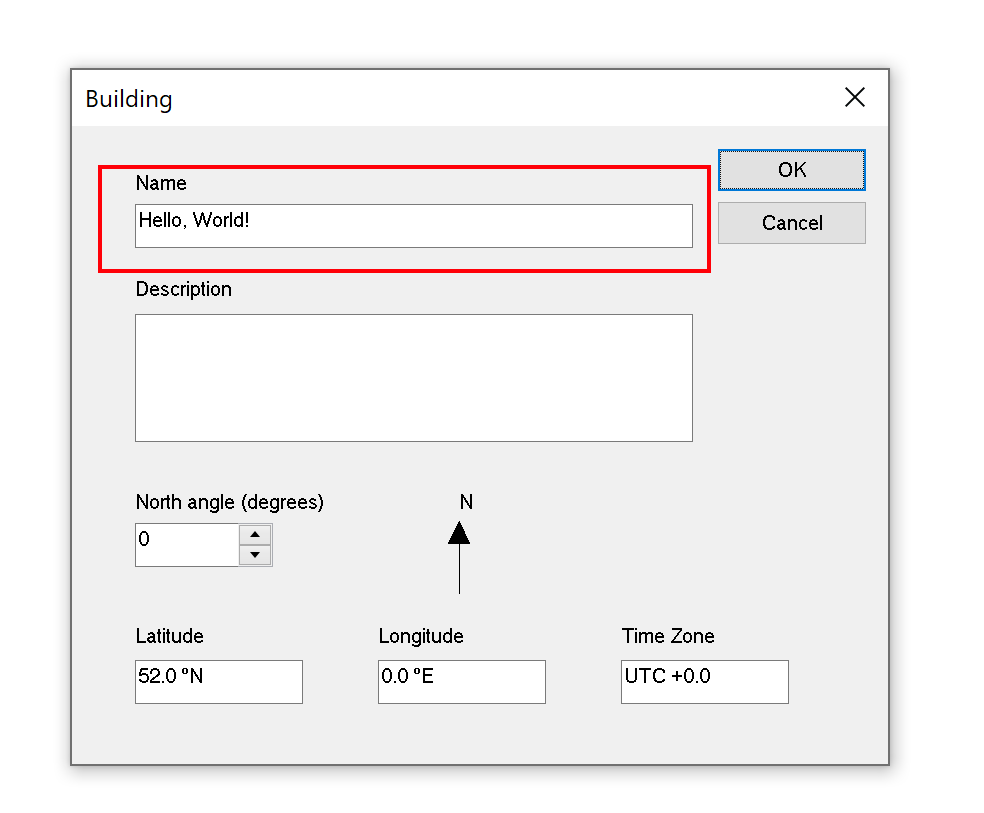
- Changed the building name
- Saved & closed the file
In this lesson, we’ll write a macro that can read zone names from an excel spreadsheet and add them to an existing 3D modeller file. Specifically, we’ll:
- Open an instance of the 3D modeller
- Open an existing 3D modeller document
- Add new zones to the file with names read from the spreadsheet
- Save & close the file.
We’ll then modify our macro to create zone groups for the new zones, and we’ll also add the option to read out the existing zones list from the 3D modeller file.
As promised in the last post, we’re building on the things we learned already. So lets dive in.
Part 1: Adding zone names to Tas3D files
Before you begin...
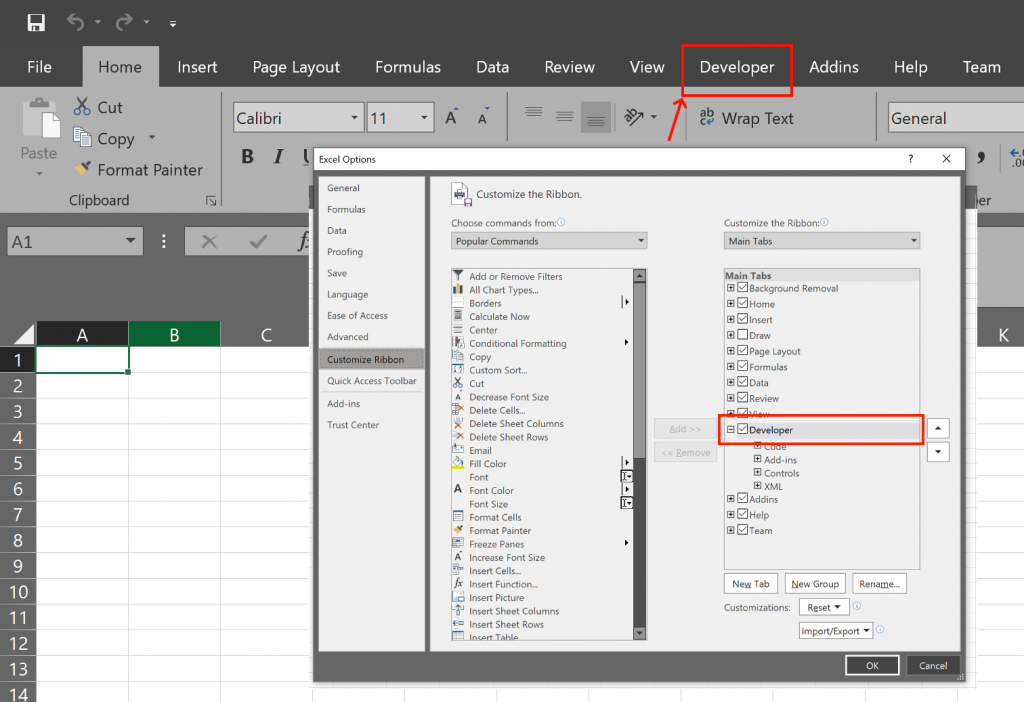
To begin, we’ll need a new 3D modeller file. Just open the 3D modeller and save the blank file to your desktop.
We’ll also need a list of zone names in excel:
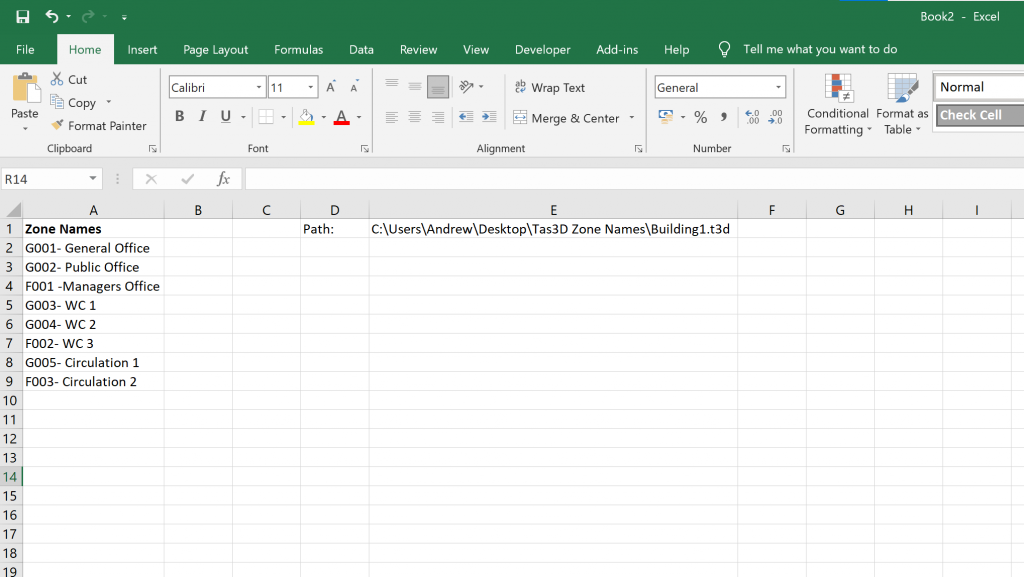
These zone names can be whatever you like, but I’ve added a column header of ‘Zone Names’ in cell A1 so I can identify which data is in that column. I have also added the file path to the Tas3D file we wish to operate on in cell E1.
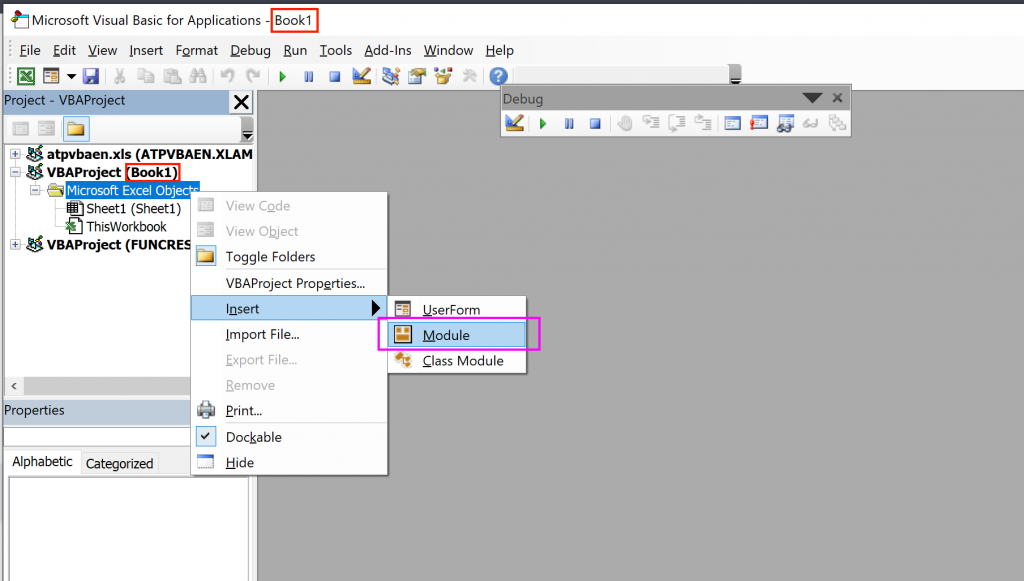
The script
As with last time, we’ll look at the script as a whole before breaking down each part. Have a read of it and see if you can understand what’s going on before we go into detail:
					Sub AddZoneNames()
    'Read the file path from the spreadsheet
    Dim filePath As String
    filePath = Cells(1, 5)

    'Open the 3D modeller
    Dim t3dApp As TAS3D.T3DDocument
    Set t3dApp = New TAS3D.T3DDocument

    'Declare a variable for checking if operations were successful
    Dim ok As Boolean

    'Try to open the existing file
    ok = t3dApp.Open(filePath)

    'Check if it did open successfully
    If Not ok Then
        MsgBox "Couldnt open the file; is it in use?"
        Exit Sub
    End If

    'Define our loop variables
    Dim rowIndex As Integer
    Dim zoneName As String
    Dim newZone As TAS3D.Zone

    'Set the starting rowIndex
    rowIndex = 2

    'Check each zone name cell to see if it contains something
    While Not IsEmpty(Cells(rowIndex, 1))

        'Read the zone name from excel
        zoneName = Cells(rowIndex, 1)

        'Add a zone to the default zone group
        Set newZone = t3dApp.Building.GetZoneSet(1).AddZone()

        'Change the name of the zone we just added
        newZone.Name = zoneName

        'Increment the row index (so we read the next cell down)
        rowIndex = rowIndex + 1

    Wend

    'Save the file and check the save was successful
    ok = t3dApp.Save(filePath)

    If Not ok Then
        MsgBox "Couldn't save the file!"
        Exit Sub
    End If

    'Close the file
    t3dApp.Close

    'Close the 3D modeller
    Set t3dAppp = Nothing

    'Message box, so we know when it's done running
    MsgBox "Finished!"

End Sub
Lots going on here! We’ve started using primitive variables, return values from functions, while loops, if statements and control statements. But as always, we’ll break it down slowly and go into more detail about each of these topics at the end of the post.
We start by reading the file path from the spreadsheet:
					    'Read the file path from the spreadsheet
    Dim filePath As String
    filePath = Cells(1, 5)
On line 2, we dimension a variable of type string (a variable that can hold text), and on line 3 we set its value equal to whatever is in the cell with row index 1 and column index 5. This corresponds to cell E1. Note that we didn’t need to use the set keyword — this is because the filePath variable is a primitive type. We only use the set keyword when we’re working with objects.
Why did we do this? We did this because if we give our macro to a colleague or are using it a lot, its inconvenient to keep opening the code editor and having to find and change the line of code that determines which file we’re adding zone names to. We didn’t have to, but it makes things easier! And less intimidating for our colleagues.
We also need the file path when we open the file and save the file, so by reading it from the spreadsheet and storing it in a variable, we only have one place to change the file path when we’re working with a different file. Very neat.
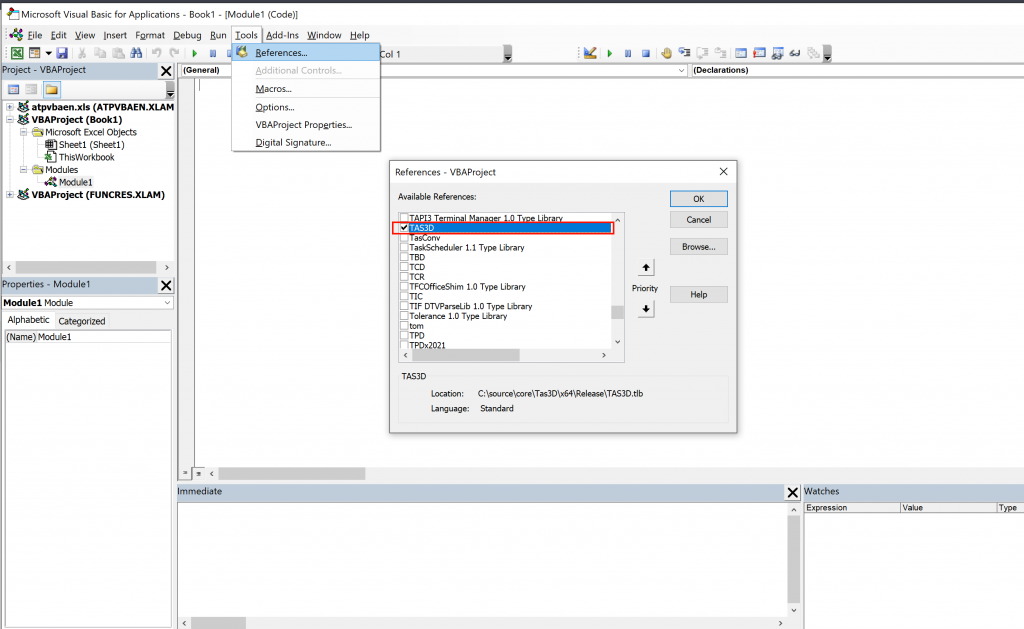
					'Open the 3D modeller
    Dim t3dApp As TAS3D.T3DDocument
    Set t3dApp = New TAS3D.T3DDocument
Next we dimension a new reference variable to control an instance of the 3D modeller, and then on line 3 we create the new instance using the new keyword and assign it to the t3dApp reference variable using the = operator and the set keyword.
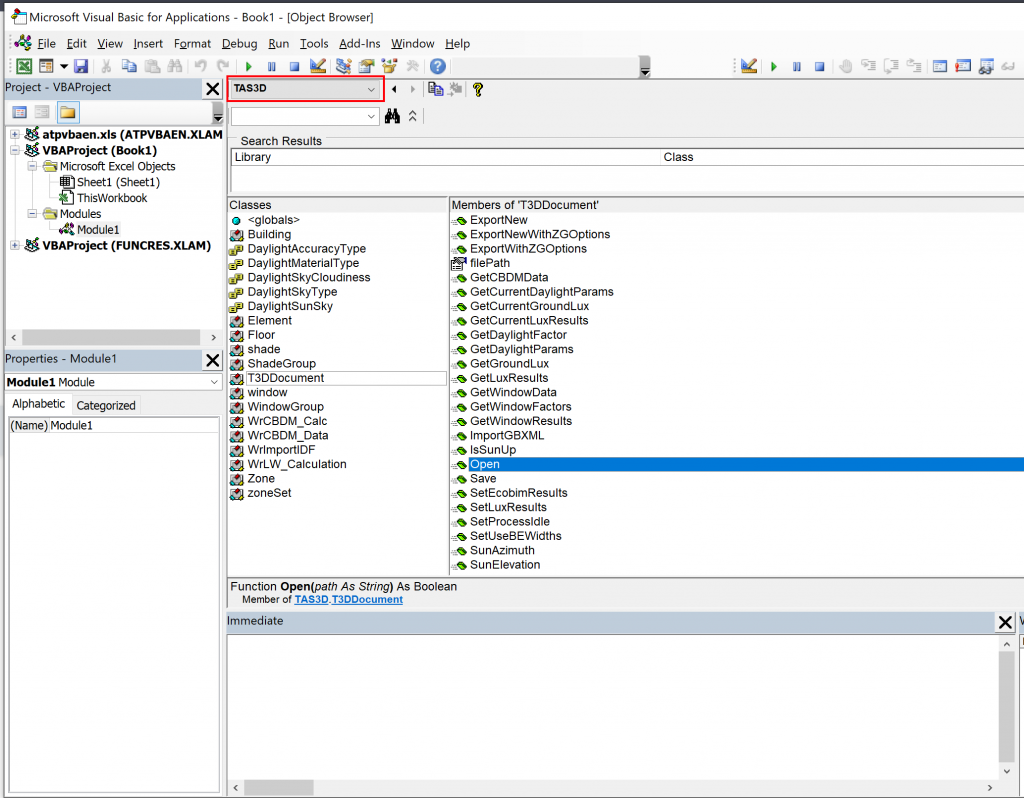
We’re almost ready to use the TAS3D.T3Document.Open function to open an existing 3D modeller file, but before we do, if we look at the function in the object browser we can see that it returns a value of type boolean:
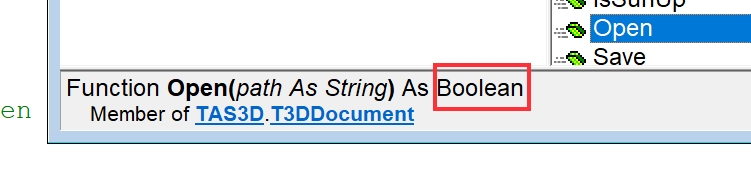
A boolean is a primitive variable type which can be one of two values: True or False. What then, does it mean if the Open function returns True or False? Tas3D returns True when the open function is successful and false when the function is not successful.
For example, if you’re trying to open a file and the file is missing, (the file path could be invalid), the Open function will return False. This will also happen if the file is in use by another application or another instance of the 3D modeller. If the operation is successful, the function returns True.
In order to check the return value of this function, we’ll dimension a boolean variable called ‘ok’ to store the value the Open function returns and we’ll check to see what that value is after we have tried to Open the file:
					    'Declare a variable for checking if operations were successful
    Dim ok As Boolean
Now we can call the Open function, storing the functions return value in the ok variable:
					    'Try to open the existing file
    ok = t3dApp.Open(filePath)
Here, we have passed in the filePath variable we declared earlier and set to contain the value of cell E5. If cell E5 was empty, the Open function would return False, so it would be useful to check the result and exit our macro early if we couldn’t open the file. After all, there’s no point reading the zone names from the spreadsheet if we cant open the file we want to save them in!
					    'Check if it did open successfully
    If Not ok Then
        MsgBox "Couldnt open the file; is it in use?"
        Exit Sub
    End If
To check the value of the ok variable, we are using an if statement. We are saying if the value of ok is Not True, display a message box and exit our subroutine early.
If statements are extremely useful as they control the flow of our macro based on conditions; for more information see the details box at the end of this post.
					 'Define our loop variables
    Dim rowIndex As Integer
    Dim zoneName As String
    Dim newZone As TAS3D.Zone

    'Set the starting rowIndex
    rowIndex = 2

    'Check each zone name cell to see if it contains something
    While Not IsEmpty(Cells(rowIndex, 1))

        'Read the zone name from excel
        zoneName = Cells(rowIndex, 1)

        'Add a zone to the default zone group
        Set newZone = t3dApp.Building.GetZoneSet(1).AddZone()

        'Change the name of the zone we just added
        newZone.Name = zoneName

        'Increment the row index (so we read the next cell down)
        rowIndex = rowIndex + 1

    Wend
Now to the heart of our macro. Remember what we’re trying to do. We need to:
- Loop through each row that could contain a zone name and see if its empty
- If there’s a zone name in that cell, store it in a variable
- Add a new zone to the Tas3D file
- Set the name of the new zone to be the one we read from the non-empty cell
In order to keep track of which row we’re currently looking at, we define a primitive variable rowIndex. On line 7, we set its initial value to 2 as row 1 column 1 contains the header Zone Name, and we dont want to accidentally create a zone name called Zone Name!
We also want a reference variable to control our new Zone object that we’ll create; we do so on line 4, and we dimension a primitive string variable to store the zone name we’ve read from the sheet.
Line 10 is a While Loop. While the condition is true, the code between line 10 and the Wend on line 24 will repeat in order.
First the while loop condition is checked; there is text in Cells(2,1), so we move onto line 13.
On line 13 we read the zone name in Cells(2,1) and store it in the variable zoneName.
On line 16 we add a new Zone object to the first zone set in the Building object. We access the first zone set by using the GetZoneSet() function belonging to Building. If you look in the object browser, you’ll see its return type is TAS3D.ZoneSet, which has the function AddZone.
On line 19 we change the Name of the Zone object to be the zone name we read earlier.
Next, we increment the rowIndex by 1, so its value goes from 2 -> 3. The while loop then repeats and checks to see if Cell(3,1) is empty.
As I only have 8 zone names in my spreadsheet, when rowIndex = 10, cells(10,1) will be empty and the while loop will stop executing.
It this seems a bit confusing, watch the video accompanying this post as its easier to walk through each line with an explanation. We can even use the debugger in the visual basic environment to walk through each line one at a time to understand what’s happening, which I’ll demonstrate in the video. Also don’t forget to checkout the additional details at the bottom of this post, regarding while loops!
					'Save the file and check the save was successful
    ok = t3dApp.Save(filePath)

    If Not ok Then
        MsgBox "Couldn't save the file!"
        Exit Sub
    End If

    'Close the file
    t3dApp.Close

    'Close the 3D modeller
    Set t3dAppp = Nothing

    'Message box, so we know when it's done running
    MsgBox "Finished!"
By now you should be able to follow whats happening here; we use the ok variable we declared earlier to check to see whether the Save function executed successfully, and if it doesnt, we display a message and exit our macro early.
On line 10 we close the file, and then on line 13 we disconnect the reference variable that controls the 3D modeller instance from the object itself so Excel closes the 3D modeller instance for us.
We then display a helpful message box so we can tell when our macro has finished running. Though our macros so far have ran very quickly, if we had thousands of zone names in our spreadsheet it could take a little while!
What about zone sets?
Ok so far we’ve relied on the fact that our existing Tas3D file has a default zone set, and we’ve just added our new zones to that existing zone set.
If we wanted to add our zones to a brand new zone set, we could modify our Macro as follows:
					Sub AddZoneNamesNewZoneSet()
    'Read the file path from the spreadsheet
    Dim filePath As String
    filePath = Cells(1, 5)

    'Open the 3D modeller
    Dim t3dApp As TAS3D.T3DDocument
    Set t3dApp = New TAS3D.T3DDocument

    'Declare a variable for checking if operations were successful
    Dim ok As Boolean

    'Try to open the existing file
    ok = t3dApp.Open(filePath)

    'Check if it did open successfully
    If Not ok Then
        MsgBox "Couldnt open the file; is it in use?"
        Exit Sub
    End If

    'Create a new zone set to store our zones in
    Dim newZoneSet As zoneSet
    Set newZoneSet = t3dApp.Building.AddZoneSet
    newZoneSet.Name = "My new zone set"

    'Define our loop variables
    Dim rowIndex As Integer
    Dim zoneName As String
    Dim newZone As TAS3D.Zone

    'Set the starting rowIndex
    rowIndex = 1

    'Check each zone name cell to see if it contains something
    While Not IsEmpty(Cells(rowIndex, 1))

        'Read the zone name from excel
        zoneName = Cells(rowIndex, 1)

        'Add a zone to the default zone group
        Set newZone = newZoneSet.AddZone()

        'Change the name of the zone we just added
        newZone.Name = zoneName

        'Increment the row index (so we read the next cell down)
        rowIndex = rowIndex + 1

    Wend

    'Save the file and check the save was successful
    ok = t3dApp.Save(filePath)

    If Not ok Then
        MsgBox "Couldn't save the file!"
        Exit Sub
    End If

    'Close the file
    t3dApp.Close

    'Close the 3D modeller
    Set t3dAppp = Nothing

    'Message box, so we know when it's done running
    MsgBox "Finished!"

End Sub
If you look at lines 23-25, you’ll see we first dimension a new ZoneSet reference variable so we can refer to our new zone set. We then create one by using the AddZoneSet function that belongs to the Building object.
We then use that newZoneSet on line 42 and add the new zones directly to it.
Question
Answer
Details: If Statements
If statements control the flow of our macros and allow us to react differently to different situations. They take the form:
					If [condition] then
    'code for if its true
End if
This if statement executes the code between lines 1 and 3 if the condition is true. We can also execute different code if the condition is false:
					If [condition] Then
    'code if true
Else
    'code if false
End If
We can also check multiple conditions in a single If Statement:
					If [condition 1] Then
    'code
Else If [condition 2] Then
    'code
Else If [condition 3] Then
    'code
End if
We can have as many ‘Else If’ statements as we like.
The [condition] placeholders are statements that evaluate to a value of either True or False. For example:
					'Example 1
Dim x as Integer
x = 4

If x = 4 Then
    'x is 4
Else
    'x is not 4
End If

'Example 2
If (1 + 5) = 6 Then
    'The condition is true
End If

'Example 3
Dim booleanValue as Boolean
booleanValue = True

If booleanValue Then
    'the booleanValue is true!
End If
We can also use the Not keyword to evaluate whether a condition evaluates to False (false is equivalent to ‘not true’):
					Dim x as Integer
Dim y as Integer
x = 4
y = 4

If Not x = y Then
    'The variables are not equal
End If
To learn more about If Statements, see ExcelEasy.
Details: While Loops
While loops allow us to repeat a section of code while a condition is true. Remember, a condition is just a statement that evaluates to either True or False.
					While [condition]

    'Some code

Wend
If the condition evaluates to False by the time we encounter the loop, the code in the loop will not be executed.
If the condition is true, usually the code within the while loop has the ability to cause the condition to eventually evaluate to False, otherwise the loop would repeat forever!
					Dim x as Integer
x = 1

While x < 10            ' < is the less than operator

    'Write the value of x to the sheet
    Cells(x,1) = x

    'Increment the value of x
    x = x + 1

Wend
This snippet writes the numbers 1 to 9 to the current worksheet. The condition on line 4 gets evaluated every time the loop repeats, so as line 10 alters the value of x, eventually x will be equal to 10 and therefore the condition will be false and the code will stop repeating.
There are a few different types of loops; there are For loops, While loops and Do While loops. For more information about loops, see ExcelEasy
Whats next?
Next time we’ll look at how we can modify our macro to dynamically add zones to different zone groups based on the contents of our excel spreadsheet, rather than just adding them all to the same spreadsheet.
We’ll also keep an eye out for duplicate zone names. Click here to go to the next lesson.